About Flexijet
Flexijet 3D
New generation of digital 3D measuring technology
Consistent drive for improvement and open for curtomer ideas and needs have brought about a fully newly developed 3D measuring hardware. Technically, ergonomical and visually completely “thought though” in order to enable even more efficient measuring.
With Flexijet 3D literally anyone can complete measurements quickly, efficiently and economically and estimate dimensions with millimetre precision and input data directly into CAD. Regardless of being a begineer or an expert or a CAD expert, Flexijet 3D enables one-step CAD measurements and offers many advantages with regard to conventional measuring techniques and point clouds of other laser scanners.
Measuring and drawing
Flexijet 3D is different from other measuring systems because it uses original CAD tools like lines, polylines, arches and circles in order to measure and draw. Instead of creating confusing point clouds that require further processing this system enables the creation of a finished CAD drawing in “real time” using on site measurements and eliminating the need for long post-processing.
During the measuring process Flexijet 3D enables the creation of precise 3D CAD object models such as walls, doors, archways, openings or entire room immediately. This means that CAD models are created at the same time as measurements which ensures high precision and eliminates the need for additional processing.
Before leaving the construction site, the finished CAD model can be compared to the on-site conditions and checked that all relevant dimensions are recorded correctly, thus ensuring that the model corresponds to reality.
The measurements are understandable for everyone because the intuitive software that immediately defines the walls, doors, windows, but also other elements in the room such as electrical and sanitary installations, air conditioners, radiators and many other elements in the room.
The cross mark in the camera now also enables point marking when conditions make it difficult to see the laser point. Laptop and hardware communication is enabled through a WiFi network protocol.
The device ensures around 8 hours of battery life (depending on screen use).
Flexijet 3D has an inbuilt feature of self-levelling and can be used manually or with an internal motor
Unique FlexiJet 3D device features
Measuring and drawing
Flexijet 3D is different from other measuring systems because it uses original CAD tools like lines, polylines, arches and circles in order to measure and draw. Instead of creating confusing point clouds that require further processing this system enables the creation of a finished CAD drawing in “real time” using on site measurements and eliminating the need for long post-processing.
During the measuring process Flexijet 3D enables the creation of precise 3D CAD object models such as walls, doors, archways, openings or entire room immediately. This means that CAD models are created at the same time as measurements which ensures high precision and eliminates the need for additional processing.
Before leaving the construction site, the finished CAD model can be compared to the on-site conditions and checked that all relevant dimensions are recorded correctly, thus ensuring that the model corresponds to reality.
The measurements are understandable for everyone because the intuitive software that immediately defines the walls, doors, windows, but also other elements in the room such as electrical and sanitary installations, air conditioners, radiators and many other elements in the room.
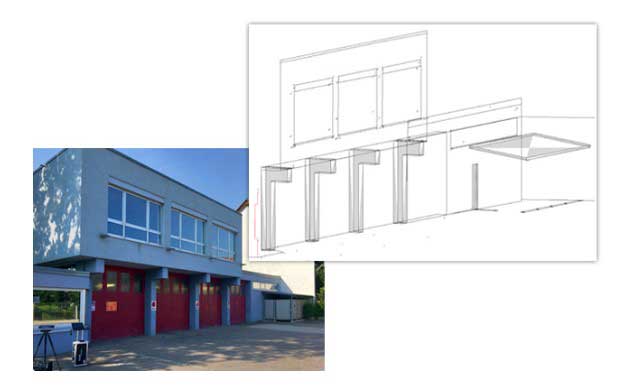
Quick space measurement
Flexijet 3D enables quick and precise measurements.
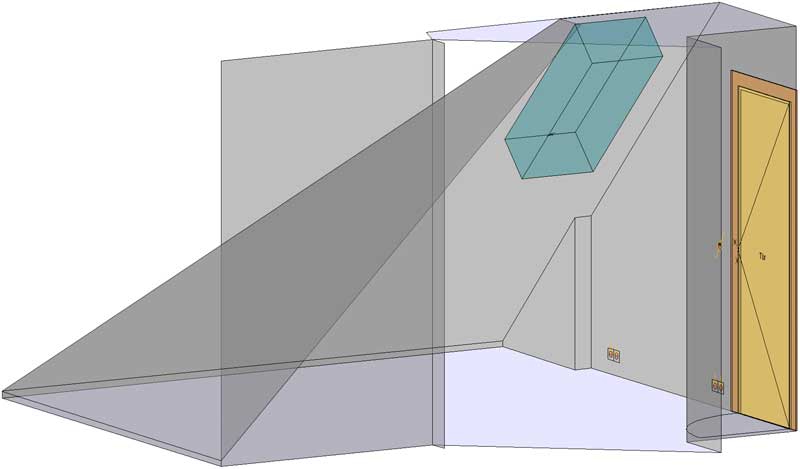
In the measurement software, a 3D space is created with only a few measurement points. With only two points per wall surface and one point each for the floor and ceiling, the room can be drawn in so few steps. There is no need to target the corners of the room as the software automatically joins the corners of walls. The corners of the walls that are connected to each other are precisely drawn during this quick site measurement process.
Additional details can be added to the rooms as needed such as roof slopes, doors, windows, pipes, lamps and switches and more.
Relocation - measurement without restrictions
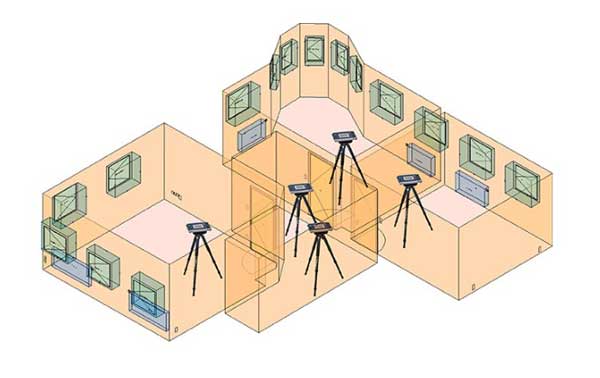
Flexijet 3D enables the flexibility of device relocation in situations where it is not possible to record all measurements from one place. If it is necessary to measure adjacent rooms and combine them in the same 3D CAD model, Flexijet 3D can easily do this.
By capturing only two reference points that are visible from both locations, the Flexijet 3D precisely references the measurement, enabling a continuous measurement process. Entire floors or buildings can be easily covered in one CAD drawing.
CAD point projection
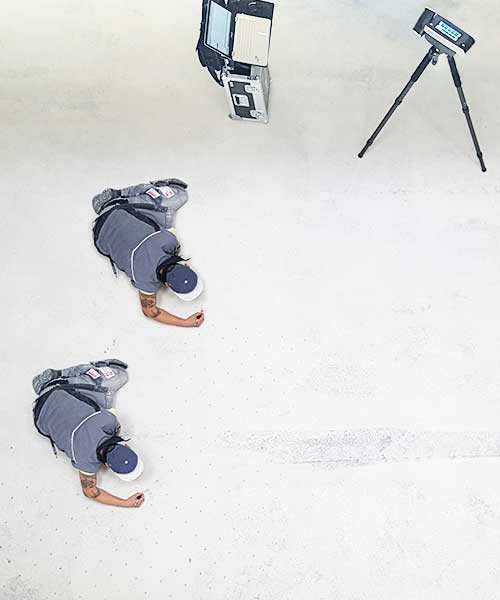
Flexijet 3D has more functionality than just precise measurement – it can be an invaluable tool for installation on the construction site. Through various commands such as “Show CAD Point” you can simply select or click on a CAD point on your laptop and Flexijet 3D will direct and rotate the laser beam exactly to the selected point on the job site.
For example, you can import CAD point drawings for a large commercial office space into Flexijet software. By clicking on a specific point location on the CAD drawing, you can see Flexijet 3D rotate and direct the laser beam exactly to that location on the spot. No more need for measuring tapes, laser levels or drawing lines with chalk. This feature can also be used to mark attachment points on the ceiling or floor
The possibilities of using this tool are only limited by your imagination. Flexijet 3D enables significant on-site design improvement, giving you precision and practicality.
Automatic series of measurements
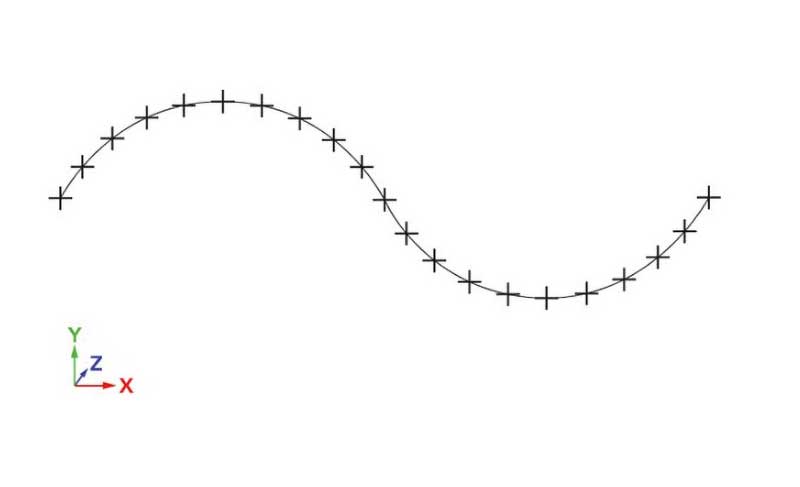
A feature that is ideal for measuring or drawing curved or uneven surfaces. Draw walls horizontally, vertically or parallel to any inclined, horizontal or vertical surface.
The process involves defining a start point, a direction and an end point. Flexijet 3D automatically measures and draws the surface profile.
Ideal functionality for stonemasons, tabletop manufacturers and architectural carpentry production.
Automatic detection of surface irregularities
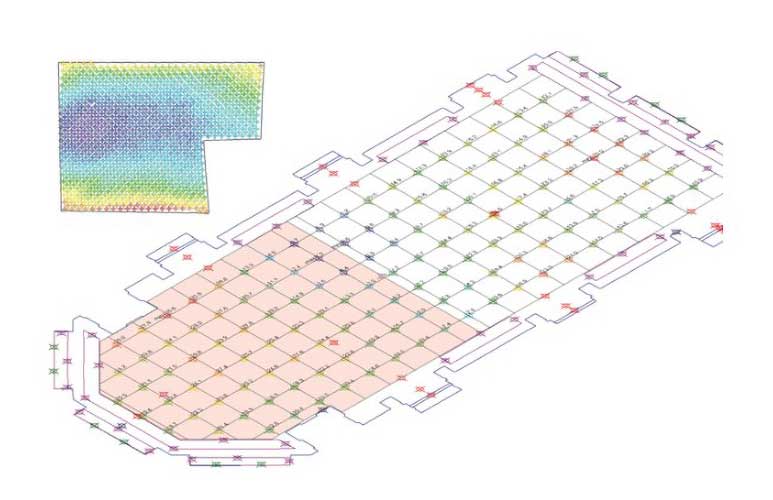
Flexijet 3D can scan any surface with predefined steps to create a 3D profile of that surface.
By drawing or measuring a closed contour and converting that object to a mesh, the Surface Scan command can automatically measure all intersection points of the mesh. The different heights are marked with different colors that reveal the unevenness of the surface.
Ideal for surface scanning of floors or walls.
FlexiJet 3D Hardware
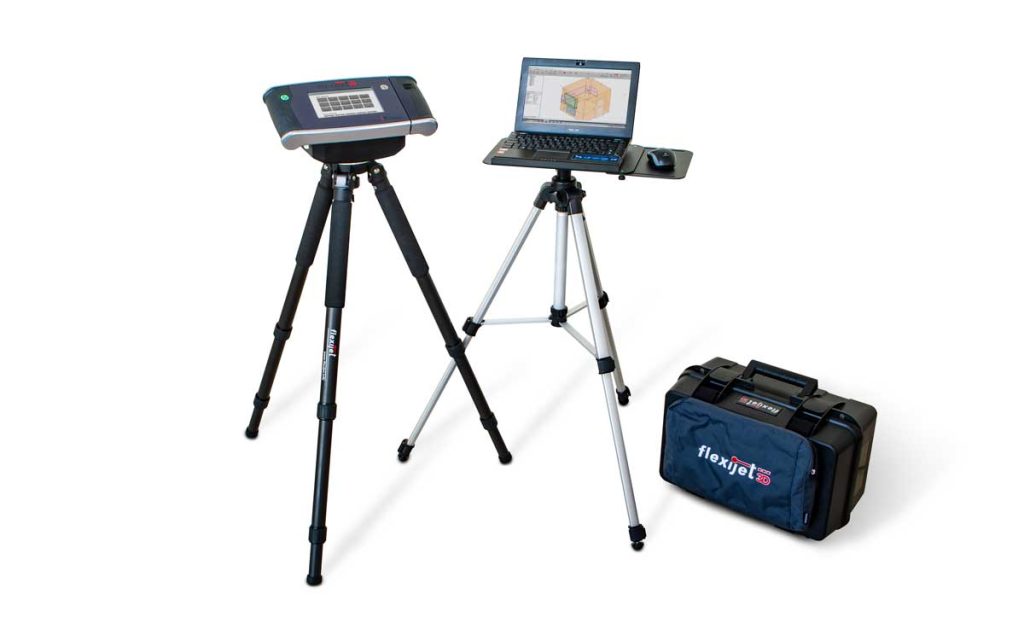
Flexijet 3D laser measurement system hardware has an ergonomic design that combines electronic, optical and mechanical components in one device. This design has received global recognition and recently won the prestigious Red Dot Design Award. Flexijet 3D is based on a laser distance meter that, in combination with a rotary/pivot unit, precisely detects the coordinates and transfers this data to one of two software for 3D measurement of the system, FlexiCAD (linkati-leads it to the FlexiCAD subgroup) or FlexijetSTONE (linkati-leads it to the FlexiSTONE subgroup).
It features a 7-inch touch screen that allows selection of CAD commands and software functions directly from the measuring device, without the need for access via a laptop or tablet. Setting up the measuring system is quick and easy and is ready for use in just a few minutes.
Flexijet measuring hardware independently provides WLAN with integrated WiFi for direct connection to FlexiCAD measuring software. There is no need to level the tripod as the software will automatically level the device. The built-in shock sensor warns of any inadvertent movement of the device to ensure the integrity of the measurement data.
An essential feature of the Flexijet 3D is the possibility of manual or remote control using the supplied remote control or via the Flexijet SmartRemote application (link to the application), which is available for free for iOS and Android devices.
The Flexijet 3D not only acts as a precise measuring device, but also as an innovative tool that facilitates installation on the construction site. The Flexijet 3D projection function allows CAD points from drawings to be projected on-site using the Flexijet 3D laser beam. This feature allows you to precisely “plot” objects such as walls, penetration points, attachment points, etc. from CAD drawings.
Measurements can be initiated via the device’s touch sensor, remote control or from a laptop or tablet. In addition to image documentation, the 5-megapixel camera enables optical target selection using the crosshairs in the camera’s live image. This allows measurements to be recorded even in bright sunlight when the laser spot is not clearly visible to the human eye.
In case the device is bumped or moved during the measurement, the integrated shock sensor registers this and immediately informs the device and the measurement software. The Flexijet 3D can be re-aligned on the drawing by re-measuring already known points and the measurement can be continued without problems.
Special System Features
One person operation
the measurement is performed by one person which reduces labor costs
Automatic levelling
no need to manually adjust the stand
NO TEMPLATES NEEDED
there is no need to create actual templates
Immediate space visualisation
slation result on-site measurement verification with automatic dimensioning and point projection
Eliminate errors
Elimination of incorrect or omitted dimensions and transfer errors.
Immediate calculations
calculation of areas or spaces immediately after measuring the required points, immediate check of the displayed results
Flexible and portable
no more scaffolding or ladders. Obstacle-free measurement 360° vertically and horizontally also perpendicular to the floor and parallel to the wall
Easy data export and transfer
Easy export of measured CAD files. Compatible with all CNC equipment and most manufacturing and design software.
Measurement errors and unmeasured details
No more handwritten measurements and notes (icon) IMMEDIATE CALCULATIONS - calculation of areas or spaces immediately after measuring the required points, immediate check of the displayed results
Complex measurements
With this system, you will measure angles, arcs, curves and other shapes faster and more precisely - effortlessly and without the need for calculations.
Inntuitive software
simple to use, without the need for great effort or special technical knowledge of the user. This type of software usually has an intuitive interface that is logical and easy to understand. It includes clearly labeled icons, simple commands and meaningful visuals.
Measurement errors and unmeasured details
No more handwritten measurements and notes (icon) IMMEDIATE CALCULATIONS - calculation of areas or spaces immediately after measuring the required points, immediate check of the displayed results